Install CP Plus Intelli Serve App on Windows PC - Step-by-Step Guide
In today’s digital age, managing your security devices should be seamless and efficient, and that’s exactly what the CP Plus Intelli Serve App offers. The CP Plus Intelli Serve app, developed by CP Plus, a global leader in surveillance and security solutions, helps users manage their after-sales services, track service requests, register products, and access customer support—all through a simple interface. While it’s widely available for smartphones, you might be wondering how you can access this convenient CP Plus Intelli Serve app on your Windows PC.
In this comprehensive guide, we’ll walk you through the entire process of downloading and installing the CP Plus Intelli Serve App on your PC. We’ll also explain how to set it up, explore its key features, and troubleshoot common issues you may encounter.
What is the CP Plus Intelli Serve App?
Before diving into the installation process, it’s important to understand what the CP Plus Intelli Serve app offers. This application is designed to provide CP Plus customers with an easy-to-use platform to manage their security devices and access after-sales services. Whether you need to register a product, log a service request, or track the status of an issue, the CP Plus Intelli Serve App is a powerful tool for managing your CP Plus security system.
Here are some key features of the CP Plus Intelli Serve App:
Product Registration: Register your CP Plus products to track warranties and receive support.
Service Request Management: Report issues and monitor the progress of ongoing service requests.
Real-Time Updates: Receive notifications about the status of your service requests.
Customer Support: Get in touch with CP Plus support teams for live assistance or chat.
Warranty Tracking: Keep track of product warranty expiration dates.
Seamless Communication: Stay connected with CP Plus support teams for quick resolutions.
The app is commonly available for mobile platforms like Android and iOS, but what if you want to use it on your Windows PC? While there isn’t a native Windows version of the app, you can still access it on your PC by using an Android emulator. This guide will show you exactly how to do that.
Steps to Download CP Plus Intelli Serve App on Windows PC
Since the CP Plus Intelli Serve App is designed for mobile platforms (Android and iOS), it’s not available directly for Windows. However, you can easily run the app on your Windows PC by using an Android emulator. An emulator essentially allows you to run mobile apps on your computer as if they were running on a smartphone.
Step 1: Choose an Android Emulator
The first step to using the CP Plus Intelli Serve App on your Windows PC is selecting an Android emulator. Emulators are software that creates a virtual Android environment on your computer. Some popular Android emulators for Windows include:
BlueStacks
NoxPlayer
MEmu
LDPlayer
For this guide, we’ll focus on BlueStacks, as it’s one of the most reliable and user-friendly Android emulators available.
Step 2: Download and Install BlueStacks on Your Windows PC
Once you’ve decided to use BlueStacks, follow these steps to download and install it:
Visit the Official Website: Go to the official BlueStacks website (https://www.bluestacks.com).
Download the Installer: On the homepage, click on the “Download BlueStacks” button. This will download the installer for Windows.
Install BlueStacks: Once the installer file is downloaded, double-click on it to begin the installation process. Follow the on-screen instructions to install BlueStacks on your PC. The installation process will take a few minutes.
Launch BlueStacks: Once the installation is complete, open BlueStacks from your desktop or start menu.
Step 3: Set Up BlueStacks
The first time you open BlueStacks, you’ll need to sign in with your Google account to access the Google Play Store. Here’s how you can set it up:
Open BlueStacks, and you’ll be prompted to log in to your Google account (just like you would on an Android phone).
Enter your Google account credentials and complete the login process.
Now that BlueStacks is set up, you’re ready to install the CP Plus Intelli Serve App on your Windows PC.
Step 4: Install the CP Plus Intelli Serve App
With BlueStacks running on your PC, you can now install the CP Plus Intelli Serve App just like you would on an Android phone. Follow these steps:
Open the Google Play Store: Inside the BlueStacks interface, locate and click on the Google Play Store icon.
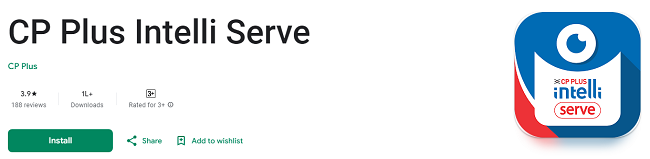
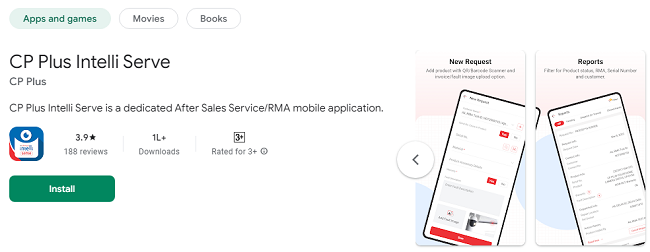
Search for the App: In the Play Store’s search bar, type “CP Plus Intelli Serve” and press Enter.
Download the App: From the search results, find the CP Plus Intelli Serve app and click the “Install” button.
Wait for the App to Install: The app will download and install automatically. This may take a minute or two depending on your internet speed.
Open the App: Once the installation is complete, you can find the CP Plus Intelli Serve app on the BlueStacks home screen. Click on it to open and start using the app on your PC.
Setting Up the CP Plus Intelli Serve App on Windows PC
Once you’ve successfully installed the CP Plus Intelli Serve App on your PC, you’ll need to complete a few initial setup steps to start using it.
Step 1: Sign Up or Log In
When you open the app for the first time, you’ll be prompted to sign up for a new account or log in if you already have one.
If you are a new user, select “Sign Up”, and fill in your name, email, and other details.
If you already have an account, click on “Log In” and enter your credentials.
Once you’ve signed in, you can begin managing your CP Plus products and service requests.
Step 2: Register Your CP Plus Products
To manage your CP Plus devices effectively, you’ll need to register them in the app. Here’s how:
From the home screen, click on “Add Product” or “Register Product”.
Enter the serial number and model number of your product.
You may also need to provide additional details, such as the purchase date and location.
Once done, click Submit to complete the registration.
Step 3: Track Service Requests and Warranty Information
Now that your products are registered, you can begin logging service requests for any issues. The app will also allow you to track the status of your service requests and monitor the warranty of your registered products.
Click on “Service Requests” to log any issues or defects.
You’ll receive real-time updates about the status of your requests, such as when a technician is assigned or when parts are dispatched.
Check Warranty Information to see the expiry dates and receive notifications before your product’s warranty expires.
Features of the CP Plus Intelli Serve App on Windows
The CP Plus Intelli Serve App on your Windows PC offers the same features as on mobile devices, making it an all-in-one solution for managing your CP Plus products. Here are the most important features:
1. Service Request Management
Easily log technical issues, product defects, or maintenance needs through the app. You can also add attachments such as photos or videos to describe your issue more clearly.
2. Real-Time Tracking
Track the progress of your service requests and receive push notifications when there’s an update on your request. This keeps you in the loop at all times.
3. Warranty Tracking
Monitor the warranty status of your CP Plus products to ensure they are covered for repairs or replacements. The app will notify you as your warranty approaches its expiration date.
4. Customer Support
Directly communicate with CP Plus customer support teams through the app. Whether through chat, email, or phone, you can always get the assistance you need.
5. User-Friendly Interface
The app’s clean and simple interface makes it easy to navigate, ensuring that you can quickly find the features you need.
Troubleshooting: Common Issues with the CP Plus Intelli Serve App on Windows PC
While using the CP Plus Intelli Serve App on your Windows PC, you may encounter some common issues. Here are some troubleshooting tips to help you resolve them:
Issue 1: App Won’t Open
Solution: Make sure that BlueStacks is properly installed and running. If the app still won’t open, try restarting BlueStacks or reinstalling it.
Issue 2: App Crashes or Freezes
Solution: Ensure that your BlueStacks emulator is updated to the latest version. You can also try clearing the app’s cache within BlueStacks or restarting your PC.
Issue 3: Service Requests Are Not Updating
Solution: Check your internet connection. If the problem persists, try logging out and logging back in to refresh the service request status.
FAQs: CP Plus Intelli Serve App on Windows PC
1. Is the CP Plus Intelli Serve App available for Windows PCs?
No, the CP Plus Intelli Serve App is only available for Android and iOS. However, you can use it on your Windows PC via an Android emulator like BlueStacks.
2. Can I run the CP Plus Intelli Serve App without an emulator?
Currently, no. An emulator like BlueStacks is necessary to run the app on your Windows PC.
3. Do I need a Google account to use the app on Windows?
Yes, you need to sign in with your Google account to access the Google Play Store and download the app.
Conclusion
Downloading and installing the CP Plus Intelli Serve App on your PC is a simple process when using an Android emulator like BlueStacks. With this app, you can easily manage your CP Plus products, log service requests, track warranties, and communicate with customer support—all from the convenience of your desktop.
By following the steps outlined in this guide, you’ll be up and running in no time. Start using the CP Plus Intelli Serve App on your Windows PC today and streamline your experience with CP Plus products!
Updates